
Natural Playsilk & Egg Dyeing
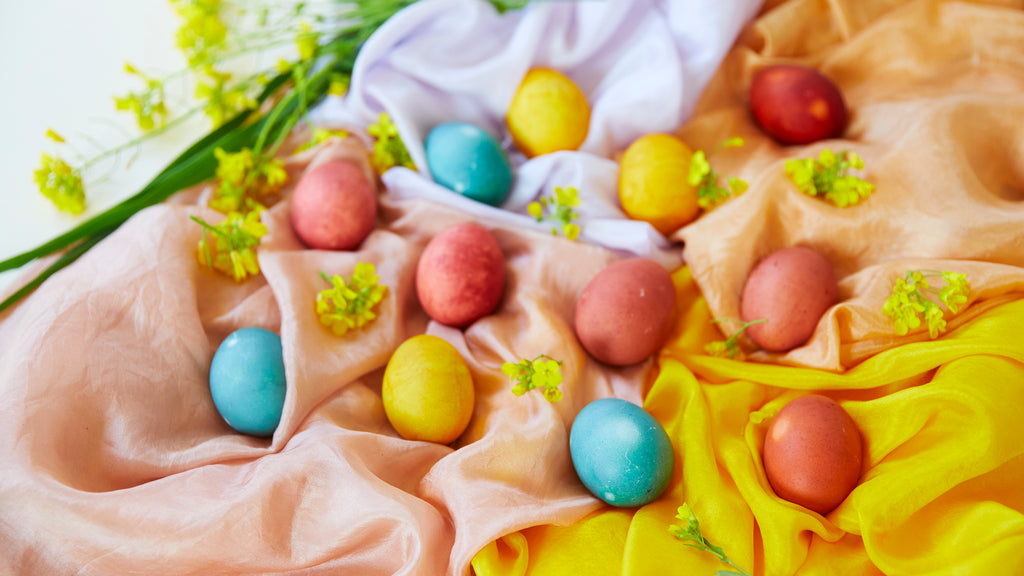
A rainbow of color may be found in your kitchen thanks to the magic of natural dye! With spring upon us at Sarah’s Silks we got our eggs and White Playsilks out for dyeing. This recipe will dye 12-24 eggs and 8 Mini Playsilks (or 4 regular size Playsilks).

We will start by making the dye for our Playsilks and use the same dye bath for the eggs. For the Playsilks we used cabbage, avocado pits, yellow onion skins and turmeric. Even after our Playsilks and eggs are done our dyes may then be used as watercolors!

What You'll Need:
-
12-24 brown and white eggs
-
Glass jars
-
Several pots for cooking the dyes
-
Half a head of purple cabbage
-
4 avocado pits
-
2 Large handfuls of yellow onion skins
-
3-4 Tablespoons of turmeric
-
Vinegar

For the Playsilks:

Bring each dye pot to a simmer for 20 minutes. For the avocado, the longer it's cooked, the darker the color. For the color pictured, we simmered our avocado pits for 1 hour.

Add your Playsilk and simmer on very low for another 20 minutes - stirring occasionally.

Ring out your Playsilks and hang to dry out of the sun (the turmeric Playsilk may need a little rinse to clean off the spice). Leave your Playsilks to “cure” as we start on the eggs.

For the eggs:
Your Playsilks and eggs will share the same dye bath.
Place your eggs in the dye pots, making sure the dye covers the eggs (add a bit of water if needed). When the dye starts to simmer, cook your eggs for 10 mins.
Note: Wooden Eggs won't work for this project, but you may try painting them with the leftover dye.
Prepare glass jars - ideally one jar for each egg to get the maximum dye coverage, but you may place 2-3 eggs in each jar.

Place eggs in jars with warm dye.

In the morning, carefully spoon out the eggs and place them on a paper towel to dry.


Happy Playsilk & Egg Dyeing!
If you wish to use food coloring to dye your Playsilks, follow along here!
Sarah & Madlyn
xoxo
I just ordered some white play silk to try with my natural dyeing….and looked at your instructions about what to use; I did not see anything about mordanting the silk before dyeing. In my experience, you need to do that so the colors will set and not wash out… or is there something pre- treated about your silk?
Brenda Matter on
This likes like so much fun! Do your silks need to be scoured before dying?
Melissa on